
Anyway, I've been trying to find ways to take better pictures, especially macro shots but sufficient lighting is the most important factor aside from the object you're photographing. A lot of bloggers use a macro lightbox for their photos, which is just basically a box lined with white paper at the platform with holes on the side so you can cover with tissue paper or cellophane as a filter which lets you control the lighting.
For example:

I decided to do my take on it with what little material I had at home. Of course it's not as cool looking as this person's but I made a sufficient one I needed for now. I'm planning to make a bigger one in the near future.
Here's what you need:
1. Cardboard Box
2. Scissors or Box Cutter
3. Transparent Tape
4. White Paper

I used a rectangular 18x18x5.5 box, but ideally the dimensions should be the same (12x12x12, etc).

I cut off the bottom and side flaps.

Use a large 11x7 white paper (mine is a textured gift box topper LOL)
You can flip the box around and use it either way as a backdrop for your photos.
That's it! So easy and cost little to nothing if you already have everything at home. I realize this is not really a lightbox but merely a backdrop than anything else. For the light, I don't actually photograph with this office lamp because of its intensity (lol). I'd suggest using natural light as much as possible, but below is probably the best alternative:

So... yeah. I plan to make a better box, but as of right now, my not-quite lightbox backdrop has improved my photos immensely. Alternatively, you can invest in a super white table and put it against a white wall (I think this is how Temptalia photographs her things.. read it somewhere on her blog awhile ago) and it should give you the same (probably better) effect.
So here is the photography debut of my backdrop using the blushes and bronzers that I recently won from Makeup By Joyce recently!!!!!!!!!! She sent me a slew of 15 drugstore items from blushes to bronzers to eyeshadows!! I got the package yesterday and I was freaking out at how gorgeous everything is *happy sigh* :)
Here are the blushes and bronzers only. Eyeshadow palettes will be in another entry!
Hard Candy Fox in a Box Blushes

Spicy & Sweet is a shimmery multi-tone mixture of pinks and a ginger bronze.

Smooth Talker is has 4 natural earth toned pinky beige shades that accent the cheeks
Hard Candy Baked Blushes


Honeymoon is a frosty pink highlighter. Similar to Mac's Porcelain Pink!
Hard Candy So Baked Bronzers


Tiki is a light colored bronzer that doubles as a shimmery gold highlighter. There isn't much bronze color in it, but enough warmth to make you look awake :)
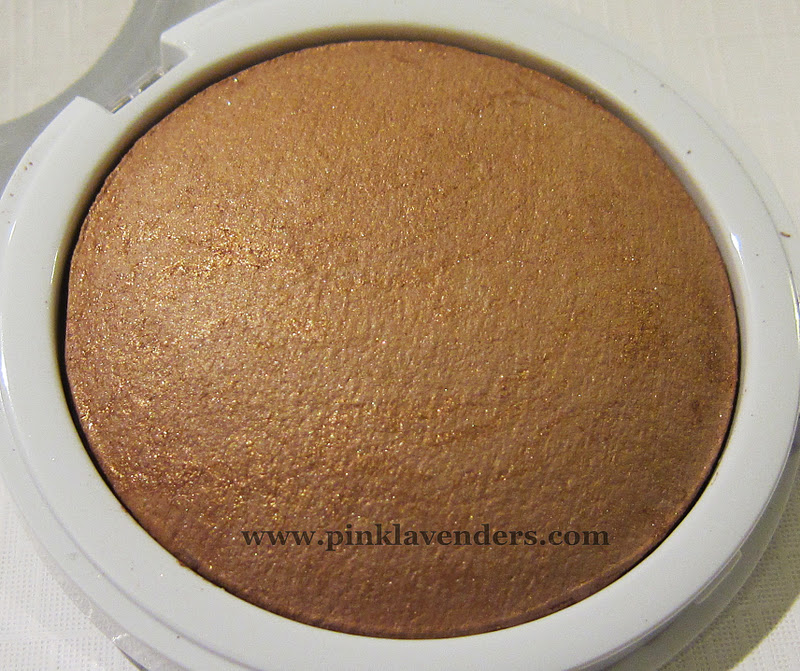

Tropics is darker than Tiki and is true bronzer! It has a golden undertone
Milani Baked Blushes are one of the most raved about blushes in the blogosphere! They're comparable to MAC MSFs for way way less. Each of these range from $7-10 at drugstores and often have discounts regularly from CVS or Walgreens.


Rose D'Oro is a gorgeous shimmery coral with a gold flecks running through the blush. It is said to be a dupe for MAC's Stereo Rose ;) I don't own Stereo Rose but I can see the similarities.


Fantastico Mauve is rose toned berry shade with frosty veins that runt through the blush that highlights your cheeks. It's also said to be a dupe for Nars Dolce Vita. I don't own Dolce Vita but if you look at the comparisons, they're quite close. This is probably the best dupe I've seen!


Milani Baked Bronzers


Glow is a golden peachy-mauve toned bronzer with gold shimmers. It is the lightest of the 3 (Glow, Soleil and Golden).


Soleil is a warm, shimmery golden bronze that's a tad darker than Glow, but still light and pretty (and very shimmery).
...that's it for now :) I have some Loreal eyeshadow palettes I still need to photograph next time. Do you guys like these blushes and bronzers? What's your favorite?
How do you guys photograph small items? Do you have a lightbox or another neat idea that I should be aware of? Do share!
48 comments:
Fabulous idea!!!! the pics are amazing :)
I like your homemade light box. Very good idea. I need something like that.
http://www.thegirlieblog.com
Haha I do the same, I just made a lousy backdrop with white paper but I don't have as big of an area so you always see the edges of my backdrop. Also I don't have lighting for my backdrop so I rely on the room light and my whites never turn out white. =_= one of these days when i'm not so lazy, I should make one.
I think yours came out really well, and the products look good on the white.
Thank you so much for the tip! I've been wanting something like. Sometimes, the flash of my camera takes away the true color of the swatches. Oh, and these Milani blushes are soooo pretty!
So that is how they photograph with a white background? I see... These are all gorgeous colours you purchased, Milani is a great cosmetics line... Tune in tmrw...you may see the tweed jacket or the scarf ;)
Great idea! I might try it later! I used to just use white paper and put the light on the side~You have a way better idea than I do:)
wow very creative home set up!
i always wanted to make one of those light boxes but always thought it was such a complicated process! thanks for sharing!
and wowwww what wonderful prizes you've won!
omg this is brilliant! awesome reviews!
Congrats on having a new setup! I think whatever works, works! :)
I NEED to make a DIY light box but thinking about setting up all those lights at the right angle blinds my imaginary visioN!
Right now, I'm using something that resembles HALF of a light box and it's fine but sooner I'll upgrade :D
Love your DIY lightbox! I was using my DIY one but recently have gotten too lazy to pull it out so have been just taking pics the way I used to. Your pictures came out great. Thanks for your reviews on the various drugstore blushes. I haven't tried any of those before.
*Kat*
wow so creative!!! your pictures turned out great! the milani blushes are so pretty, am def gonna try some out. have read so many great reviews on them.
Love the light box, it's such a great way to take photos with white backgrounds sans shadows and messiness!
And I am sooo jealous of all those blushes! OMG, I wish Milani was sold in asia! Definitely will be blush hording when I get the chance! Thanks for sharing, love your post!
oh wow! Milani bakes blushes and bronzers are pure love!
You might want to try a bristol board as the infinity background for your box. i think it's more white than yellow/warm :)
definitely going to be making one of these when I get my DSLR & ring light ^___^ Thanks for giving your take on how you made yours - definitely makes your photos look amazing :D
I am impressed!!! Now, if I can just do that for my outfit photos....
♥ laura
the blog of worldly delights
THANK YOU FOR THIS!!! i so needed to read and learn and do this!!!! I also need that Rose D'oro blush. You're amazing!!! :)
A lightbox seems like a great idea for photographing objects. I usually just prop them up in the corner of my house with the most natural light.
thank you for the tutorial! :) i think i need to make a lightbox soon because it's always been raining here and i can't get natural lighting.
and, all the blushes look really pretty! :D
This is an excellent post--definitely something I'll be doing over the Christmas holidays! You got the Milani blushes too! Hopefully you'll like them <3
I can't believe I never thought of thiiiiiiis! Amazing tutorial, I need to find some lights to make this work but otherwise i'm all up to do this ASAP!
Light box!!! I had no idea this is the secret that so many bloggers had to their perfect background pictures...I always thought they had a really really really white room in their home. LOL! This is a great idea though! It makes things look so professional. :D
Milani baked blushes...Luminoso keeps finding a way to avoid my hands! No matter what CVS I enter, they -never- carry the baked blushes...I'm beginning to wonder if New England is just odd? :(
blushes galore!!! I actually don't use a light box. I just made Mr. Nunu change all the lights in our bathroom to white lights and paint all the walls white! So essentially my bathroom is one big light box....
that's cool! the products look great with the light box! ;D
Babe! I made my own light box a couple of months back too and have since started using it. I'm so amazed at the effects and should have done this waaay earlier! Now I just need that DSLR.....
xoxo,
Roxanne
I have a bunch of Milani baked blushes and Glow. I LOVE THEM ALL. Great picks. :)
Wooow, so many lovely cheek products!
I've also recently created a makeshift lightbox, but I still need a good light source... Taking photos is such a pain right now.
Wow what an awesome idea! I always have a hard time taking good pictures because of bad lighting!
love the blushes! And the mini studio is really cute : D
the lightbox looks awesome! whatever gets the job done, right? the colours are more consistent and your swatches are amazing. yay!
wow, great idea with the lightbox!! I'm taking note!!
I've always wanted to DIY my light box but never got around to do it. Great end result!!! XD
Thanks for showing how you made your lightbox! The photos turned out great! I'm just WAY too lazy and low on space for a box. I tweak my photos via Aperture haha I really really want to try these milani blushers but its not widely available here in Canada :( Looking for a nice berry shade for Winter and Fantastico Mauve looks like a great color ;)
ooh your own light room! that's awesome, I've been wanting to make one for a while but haven't got around to it, thanks for sharing!
I've been meaning to make a lightbox of some kind because lighting in my apartment is awful and it's so hard to get product shots. For now I've just been using a small wooden table and spotlight style lamps.
xo, alison*elle
All: Thanks for the comments! =)
ciao,
nice selection ...I like the TIKI one !
come for a visit, and if you like follow me ...I'll do back
ave
omg. thank you so much for the lightbox post!
i've been thinking about making one for the longest time ever but always forget to google it!
YES! THANK YOU :D
and those blushes are absolutely gorgeous!
hope you'll have a wonderful weekend!
xx
- Coco
I think your box looks very neat but even I think it is easier to put a white table against a white wall:D
For some reason, I've never heard of a lightbox before:(. I should totally make one, your photos turned out great, I wonder if it will it work as well with swatch photos. Congrats for winning, you got some awesome stuff.
I'm so glad I came across this post! Now that really makes sense how some bloggers take such nice photos with that clean space and lighting all around the object. Will try to make my own lightbox this weekend, thanks for sharing!
http://dear-diary.dawnelia.com
wow the macro box thing i never knew people took photos like that! HAHA i just take my pics of objects on my unattractive brown table!
Thanks for stopping by my blog :)
www.candypop-lamour.blogspot.com
I just made a light box recently. It's extremely horrible looking but I guess my photos seem better. There's nothing to focus on besides the product.
the swatches look really clear and true to colour - thanks for light box for the tut! I'm thinking of making a tiny one when I move haha
All of these blushes swatch lovely. I love the Hard Candy Box blush~ Looks so interesting.
I need o make a lightbox too!
Woah, the Milani blushes are soooo pretty. I really need to try them already xD
Wow! Light box does make a difference! XD Maybe I should make one!
Post a Comment